
Here to help

Installation Guides

Get drive-thru equipment support here. Everything you need to install, set up, and troubleshoot your Avio Drive-Thru kit — quick guides and setup walkthroughs for every kit and accessory, answers to common questions, and our warranty and returns policies, all in one place. Can’t find what you’re looking for? Call a product specialist at 800-886-5607. For hands-on drive-thru equipment support, browse the guides below or explore our full product lineup.
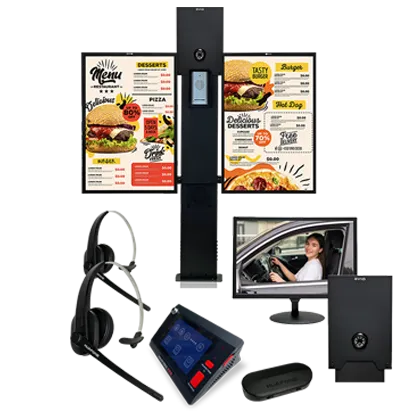
Testing & Diagnostics Guide

Find your symptom below and work through the steps in order. Each section lists the most likely causes first, the fix for each, and what to send us if it is still not resolved. Last reviewed: September 9, 2026.

Before you install: 10-minute bench test (all kits)

Test the system on a table before you mount anything. Most faults reported after installation are cable or setup issues that a bench test catches in minutes, and it is far easier to fix them indoors.

  1. Connect the base station, speaker post (or substation) and power supply exactly as the quick guide shows, using the supplied cable.
  2. Power on. Confirm the base station boots and, on Kit 3, the 5-inch touch screen responds.
  3. Pair every wireless headset (Kit 2 and Kit 3) and confirm each shows as paired. On Kit 3 note which headset is labeled Main and which is Listening.
  4. Have one person speak at the speaker post while another listens at the base station or headset: confirm audio both ways (inbound and outbound).
  5. On Kit 3, wave a hand or move a metal object in front of the ProPanel® sensor: the mic and speaker should go live, then mute again about three minutes later.
  6. If anything fails on the bench, work through the matching symptom below before installing.

Keep the box and packing until the system passes on the bench and again after installation.

Driver can’t hear staff (outbound audio)

Applies to: Pro Intercom System AIO-K3-L1 / AIO-K3-L2 and the Pro Bundles. Outbound path: base station or headset → outdoor speaker.

The base station runs in one mode at a time: POS Wireless (staff talk through the Main headset) or Fixed Mic (staff talk into the base station mic). The Listen-In headset is receive-only and cannot take orders. Confirm the mode and the headset label before anything else.

#Root causeFix
1Wrong headset in use: the receive-only Listening headset is worn instead of the Main headset. On older systems both look identical.Check the label on the headset; it must read “Main”. Keep the two on separate chargers or color-code them.
2Main headset muted, unpaired, or volume down.Clear mute, confirm it shows as paired (re-pair if not), raise the volume. Then check the POS headset volume and mute on the touch screen too.
3Base station stuck in Fixed Mic mode while staff use the wireless headset.Switch the base station to POS Wireless mode.
4Touch-screen mute left on for the built-in speaker or gooseneck mic (for example after setup).On the 5-inch screen, confirm the POS headset, gooseneck mic and built-in speaker are all unmuted and in Talk mode.
5Base station fault: audio fails in both modes.Run the isolation test below. If both modes fail after ruling out 4 and the ProPanel® auto-mute, contact support.
6CAT5e cable between the speaker post and base station loose, damaged or not fully seated.Reseat both ends; check for bent pins, corrosion or damage. Replace if damaged.

Isolation test: wireless side or base station?

Switch the base station to Fixed Mic mode and speak into the fixed mic while someone stands at the speaker post.

  • Driver hears you: the Fixed Mic path is good and the fault is on the wireless side. Verify the Main headset is in use, paired and unmuted, and that the base station is back in POS Wireless mode.
  • Driver does not hear you: both modes fail. Rule out the touch-screen mute (cause 4) and the ProPanel® auto-mute at the post (is a vehicle present?). If both are clear, suspect the base station, the post-to-base wiring, or the outbound speaker. Contact support with the result.

Still not resolved? Send us: Photos of the outdoor speaker post (front and back), confirmation of the electrical connections, and a short video of an actual order attempt. Have your order number, purchase date and product ready. Download this guide as a PDF.

Staff can’t hear the driver (inbound audio)

Applies to: Pro Intercom System AIO-K3-L1 / AIO-K3-L2 and the Pro Bundles. Inbound path: speaker post microphone → base station.

The speaker post houses two units in one factory-installed ProPanel®: the mic / substation at the top (inbound) and the speaker at the bottom (outbound). The built-in sensor unmutes both when a vehicle arrives and mutes them again about three minutes after it leaves; muting with no vehicle present is normal.

New installation? Start with the CAT5e cable (cause 2) and confirm the sensor detects a vehicle (cause 5). In service for a while? The weatherproof seal is the usual suspect (causes 3 and 4).

#Root causeFix
1Speaker post location not per the installation guide (height, distance, angle).Reinstall the post at the correct location and height per the guide.
2Cable connection: CAT5e between post and base station loose, damaged or not seated.Inspect and reseat both ends; replace the cable if damaged.
3Weatherproof seal breach: moisture or debris has reached the mic.Replace the outside speaker unit, or the whole post assembly if damage extends beyond the speaker.
4Substation seal failure at the mic element.Replace the substation (top mic unit).
5Auto-mute not releasing: the ProPanel® sensor does not detect the vehicle, so the mic stays muted.Confirm the sensor detects a vehicle arriving and leaving. If not, treat it as a sensor setup or placement issue before suspecting the mic.

Quick check for cause 5: park a vehicle at the post. Within seconds the mic and speaker should go live; about three minutes after it leaves they should mute. If they never unmute, the problem is detection, not the microphone.

Still not resolved? Send us: Photos of the outdoor speaker post (front and back), confirmation of the electrical connections, and a short video of an actual order attempt. Have your order number, purchase date and product ready. Download this guide as a PDF.

Headset won’t pair, drops pairing, or has no audio

Applies to: Wireless Headset System (Kit 2) and Pro Intercom System (Kit 3).

  1. Charge the headset fully first. A low battery is the most common reason a headset pairs and then drops.
  2. On Kit 3, confirm you are pairing the Main headset to the base station. The Listening headset pairs to its own transmitter/charging unit, not to the base station, and only receives audio.
  3. Confirm the base station is in POS Wireless mode; in Fixed Mic mode the headset is not used.
  4. Re-pair following the Kit 3 re-pairing guide (Kit 2: see the quick guide).
  5. Check headset mute and volume, then the per-device volume and mute on the base station.
  6. If the headset pairs but audio drops when you walk away, move the base station away from metal cabinets, Wi-Fi access points and other 2.4 GHz equipment, and keep it off the floor.

Still not resolved? Send us a short video of the pairing attempt and the base station screen, plus your order number and purchase date.

Vehicle not detected, or the mic stays muted

Kit 3 speaker post (ProPanel® sensor): the sensor is what unmutes the mic and speaker. Confirm it reacts when a vehicle pulls up and re-mutes about three minutes after it leaves. If it never reacts, check the CAT5e cable and the post position before suspecting the panel.

Vehicle Detector System (AIO-VDS), used with Kit 1, 2 and 3: a buried sensor wand connects to an outdoor transmitter, which signals the indoor receiver/chime wirelessly.

First check: does the transmitter LED flash when a car passes?

  • Flashes, but no chime indoors: the wand is fine; the fault is on the wireless or receiver side. Move the receiver away from metal cabinets and other wireless equipment, make sure it is on an unswitched outlet, and check distance (rated up to 400 ft).
  • Does not flash: the fault is on the wand, cable, sensitivity or battery side. Replace the transmitter battery, check the cable run and splice for water or edger damage, and adjust sensitivity.

Placement checklist

  • Wand within 2 ft of the driveway edge, buried about 1 ft deep, at least 25 ft from the roadway and other traffic.
  • About two car lengths ahead of the speaker post, where cars actually stop today (queue, paving or menu-board changes can move that spot).
  • On a curved lane, install on the inside of the curve only.
  • Keep the wand away from rebar, conduit, HVAC units, walk-in condensers and transformers; cycling electrical loads and buried metal cause misses and false triggers.

If only certain vehicles are missed (aluminum-body pickups, some EVs), that is a weak metal signature, not a fault; raise sensitivity slightly. If a detector keeps failing after parts have been replaced, the wand location is wrong for the site. See the Vehicle Detector Setup Guide.

Menu board won’t light, or lights partially

Applies to: LED backlit menu boards (AIO-MBW-1P, AIO-MBF-1P, AIO-MBF-2P) and the Pro Bundles.

  1. Confirm power at the board: the outlet is live and unswitched, and the power supply LED (where fitted) is on.
  2. Check the connections between the power supply and the LED panel inside the housing; a plug that vibrated loose in shipping is the most common cause on a new board.
  3. One panel lit, one dark on a 2-panel board: swap the panel connectors to see whether the dark side follows the panel or the supply. That tells us which part to replace.
  4. Dim or flickering: check the supply voltage and for water inside the housing after heavy rain; confirm the housing gasket seats fully when closed.
  5. Follow the AV-90 setup guide for the panel and graphic installation steps.

Still not resolved? Send us photos of the inside of the housing with the door open, the power supply label, and a short video of the fault, with your order number.

Before you contact support: what to have ready

Working through the steps above first is the fastest path to a fix. When you do reach out, this is what lets us resolve most cases in one exchange:

  • Order number, purchase date and product, so we can pull up your order immediately.
  • Which steps you completed and what you observed at each one.
  • Photos of the outdoor speaker post, front and back, and of the electrical connections.
  • A short video of an actual order attempt. It tells us whether the problem is inbound, outbound or both.

Email support@avio-tech.com, call (800) 886-5607, or use the chat on this site. Warranty and return requests start with the form in the Return & Refund section below.

Download the guides: K3 Outbound Audio Diagnostics (PDF)  |  K3 Inbound Audio Diagnostics (PDF)

Frequently Asked Questions

How do I place an order?
  • Search for the item you wish to buy.
  • Tap the “Add to Cart” button.
  • Once you’re done, click the cart icon at the top right of the page to view your items.
  • Select the items on cart you wish to order.
  • Click “Proceed to Check out” to confirmed.
  • Select your preferred payment method.
  • Make sure that your order and billing details are correct before proceeding to “Place Order”.
  • A confirmation text/email will appear once your order has been successfully placed.
How much is the Shipping Fee?

Avio Technologies uses UPS for orders within the continental United States, and for international orders. Shipping rates will be calculated by UPS calculator at the check out.

Ordered placed before 2:00PM Central Time during work days will be shipped out in the same day.

How long will the delivery take?

The delivery time will depend on the UPS shipping method you selected.

Orders placed before 2:00PM Central Time during work days will be shipped out in the same day.

How can I track my parcel?

You will receive an automated email containing your parcel’s tracking information when shipment has been made.

You can also track your parcel with your order number via ORDER TRACKER located at the bottom of the page, under INFORMATION

Do the Drive-Thru Kits have a warranty?

Yes, all Drive-Thru Intercom Kits have a one-year warranty.

Where should the speaker be installed?

Speaker should be installed:

  1. Approximately 4-ft up from ground.
  2. Within 3-ft between speaker and the driver.

Note: If your menu board is more than 3-ft from the driver, do not mount speaker to menu board. Use a speaker post.

My speaker location requires longer wires. What to do?

For Kit 1 and Kit 2: Most customers found the included 60-ft Avio-engineered wires are adequate. However, in case you need additional 30-ft or 60-ft Avio-engineered extension wires, please visit www.avio-tech.com.

In the rare case that your speaker location requires longer than 120-ft wires, please contact Avio Technologies Tech Support for more instructions.

For Kit 3: A 10-ft of Cat 5 cable is included for pre-installation system testing. Use your own Cat 5 cable that meets your length requirements, up to 250-ft, for your site.

I am replacing an old intercom. What do you recommend?

Take advantage of your current installed wires. Our Avio Wiring Retrofit Adaptors Kit’ can convert existing wires and will make your installation much easier at a minimum cost.

Visit www.avio-tech.com.

I cannot hear customers, and/or customers cannot hear me. Why?

Please check these possible installation errors, step by step:

Step 1Error:Wrong port is used.
Solution:Ensure 3.5mm speaker wire is plugged into “OUT” port on the back of master station. (Not “MIC”, which is used for recording conversation with optional equipment.)
Step 2:Error:3.5mm plugs are not plugged-in completely at master station and speaker.
Solution:Check all the plugs.
Step 3:Error:Extension wires are disconnected during wire installation through conduit.
Solution:Tape 3.5mm male end to female end before pulling wires through conduit. Prevent rain and excessive moisture.
Step 4:Error:Speaker is installed too far from customers, too low from ground.
Solution:Please see page 1 for proper speaker location.
Step 5:Error:Headset is not paired properly to master station.
Solution:Please refer to “Quick Start”. Pairing process is not complete until pairing confirmation announcement is heard over headset.
Step 6:Error:Volume Control on master station is turned off.
Solution:Turn the volume knob clockwise to max.
Step 7Error:MIC1 Push Button on master station is turned off.
Solution:Ensure indicator light above MIC1 button is on.
Step 8:Error:Mute function on headset is accidentally selected.
Solution:Refer to “Quick Start”to unmute headset.
Step 9:Error:SmartSpeaker® privacy feature is activated.
Solution:SmartSpeaker® will automatically turn to mute mode 45 second after the previous customer leaves, until the built-in sensor detects the next customer. During testing, have a second person stand in front of speaker to unmute speaker.

Still stuck? Our Testing & Diagnostics Guide walks through this symptom step by step: “Driver can’t hear staff” and “Staff can’t hear the driver,” with the most likely causes, the fix for each, and a quick test to tell whether the fault is on the headset side or the base station.

How long do I have to return an item?

All returns must be made within 30 days of delivery.

What items are returnable for refunds?

New or Unused Items

  • Pre-approved returns must be in their original condition – with all original components.
  • Returned parts cannot be disassembled, painted, mounted or damaged due to incorrect or attempted installation.
  • All items must be repackaged in their original, undamaged packaging.
  • Installed, plugged in, or unsealed electrical parts or components are not refundable.
Is there a restocking fee?

Returned parts are subject to a 15% restocking.

How do I package my return?

All items must be repackaged in their original, undamaged packaging.

Parts must be in their original condition – with all original components. The part cannot be disassembled, painted, mounted or damaged due to incorrect or attempted installation.

Who is financially responsible for return shipping charges?

You are responsible for all return shipping charges.

When will I receive my refund?

If your returned is approved, you should receive your credit within 15 days of the date we receive the return at our warehouse.

Credit will be applied to the same credit card or account used for the purchase.

Return & Refund

Start a return or warranty request

Answer a few quick questions and we will route your request to the right team. Takes about a minute.

Your order

Helpful if our tech team needs to walk you through a fix.

On your order confirmation email.

The day the order arrived.

Has the product been installed or used?

This decides whether your request is handled as a return or under warranty.

About the return

Tell us what is happening

Because the product has been installed or used, this is covered by the 12-month warranty rather than the 30-day return policy. Our technical support team will work with you to find a solution.

The more detail you give us, the faster we can pinpoint the fix.

Most warranty issues are resolved by the steps in the guide. Checking them first gets you a faster answer.

Add photos or a short video

Optional, but it speeds things up a lot.

    Need it sorted sooner? Call a product specialist at 800-886-5607 ext. 2.

    Warranty Policy

    Product Warranty

    Avio Technologies warrants that its drive thru product line will be free from defects in material and manufacture for the period indicated below from the date of shipment to purchaser by Avio Technologies or its authorized dealer. If the Avio Technologies product does not conform to this warranty, the sole and exclusive remedy is, at Avio Technologies’s option, repair or replacement of the Avio Technologies product or refund of the purchase price. NEITHER AVIO TECHNOLOGIES NOR YOUR RETAIL DEALER OR SELLING DISTRIBUTOR SHALL BE LIABLE FOR ANY INCIDENTAL OR CONSEQUENTIAL DAMAGES FOR BREACH OF ANY EXPRESS OR IMPLIED WARRANTY ON THE PRODUCTS, INCLUDING WITHOUT LIMITATION COMMERCIAL LOSS, INCIDENTAL EXPENSES, LOSS OF TIME, OR INCONVENIENCE. EXCEPT TO THE EXTENT PROHIBITED BY LAW, THE WARRANTY IS EXCLUSIVE AND IN LIEU OF ALL OTHER EXPRESS AND IMPLIED WARRANTIES WHATSOEVER, INCLUDING BUT NOT LIMITED TO THE WARRANTY OF MERCHANTABILITY AND FITNESS FOR A PRACTICAL PURPOSE.

    This warranty does not cover:

    • Repair or replacement of existing cable or wiring
    • Product failure caused by misuse, abuse, accident or neglect, improper installation or operation, improper storage, or unapproved modifications
    • Avio Technologies products that are installed or serviced by a non-Avio Technologies authorized party.  
    • Products which have not been charged for six (6) months. If the battery in a product has not been charged for a period of six (6) months, the product might not function or regain its full potential and long-term performance. Avio Technologies does not offer any warranty for such performance. It is the owner’s responsibility to operate and care for the products in accordance with the instructions and specifications supplied with the products. Repairs resulting from failure to do so are not covered by the Warranty.
    • Other acts which are not the fault of Avio Technologies.
    • Specifically exempt from warranty are limited-life consumable components subject to normal wear and tear, such as microphone windscreens, ear cushions, modular plugs, ear tips, ear hooks, decorative finishes, batteries, and other accessories including all foam products.
    • The Warranty is invalid if the factory-applied serial number, date code label, and/or product label has been altered or removed from the products.
    • Non-Avio Technologies products or accessories or any damage to Avio Technologies products caused by such non-Avio Technologies products or accessories.
    • In no event will Avio Technologies be liable for incidental or consequential damages or the loss of profits arising from the use or inability to use any Avio Technologies products or from accidents or acts of god.
    • Activities that cause power spikes or similar results can impact the performance and life any electronic devices.  These results of situations are not considered a result of any manufacturer’s defects and therefore not covered as part of the Warranty. We do recommend you consider purchasing a quality power conditioning/surge protection unit for your system as well as any other key electronic devices in your stores to help mitigate any risk should such a situation occur.  

    The Warranty sets forth the extent and limit of Avio Technologies obligations towards the end-user of the products except as modified by applicable Law. AVIO TECHNOLOGIES MAKES NO WARRANTIES, EXPRESS OR IMPLIED, INCLUDING WARRANTIES OF MERCHANTABILITY AND FITNESS FOR A PARTICULAR PURPOSE, WITH RESPECT TO AVIO TECHNOLOGIES PRODUCTS, EXCEPT AS SPECIFICALLY SET FORTH ABOVE.

    ProductWARRANTY PERIOD
    Headsets and Base Station12 months
    Top Batteries and Battery Charger12 months
    Speaker, Microphone, Cable12 months
    Consumable items (ear cushions)Not Warranted
    Out of Warranty Repair / Service Parts6 months

    NOTE.  The Warranty gives you specific legal rights. You may also have other rights which vary from state to state. Some jurisdictions do not allow the exclusion or limitation of incidental or consequential damages or implied warranties, so the above exclusions may not apply to you. The Warranty does not affect your statutory legal rights under your applicable national or local laws.  

    Still Need Help?

    Reach our team instantly — no ticket required.

    Call Us or Email Us

    Speak with our support team

    (800) 886-5607 support@avio-tech.com

    Text Us

    Send our Tech Support team a message

    (512) 660-7778
    QR code to text Avio Tech Support

    Chat Now

    Chat for quick help on product issues, orders, and more.